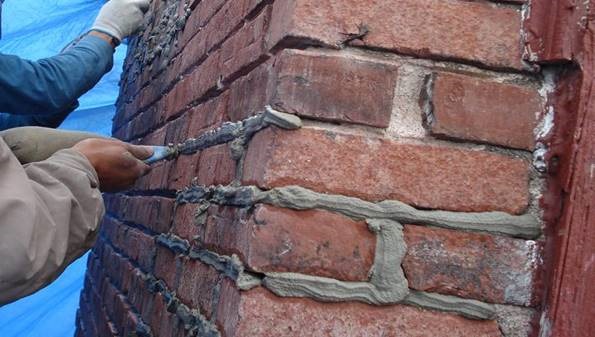
Pointing in Brick Masonry Construction
Pointing in masonry construction is the finishing of mortar joints in brick or stone masonry. Pointing is the implementing of joints to a depth of 10 to 20mm and filling it with better quality mortar in desired shape.
In exposed masonry, joints are considered to be the weakest and most vulnerable spots from which rain water or dampness can enter.

Mortar for Pointing Work
- Lime mortar of 1:2 ( 1 fat lime : 2 sand or surkhi)
- Cement mortar of 1:3 ( 1 cement : 3 sand)
Preparation of Surface for Pointing
All the joints in masonry are raked down to a depth of 20mm while the mortar is still soft. The joints and surface are cleaned and then thoroughly wetted.
Methods of Pointing
After preparing the surface as mentioned above, mortar is carefully placed in joints using a small trowel. The placed mortar should be of desired shape. Whenever the fresh mortar is placed in the joints it should be pressed hardly to gain strong bond with old interior mortar.
Care should be taken while using ashlar or 1st class brick work otherwise the mortar does not cover the face edges. The pointed surface is kept wet for at least a week or till it sets after application.
Types of Pointing
1. Flush Pointing
In this type, mortar is pressed hard in the raked joints and by finishing off flush with the edge of masonry units. The edges are neatly trimmed with trowel and straight edge. It does not give good appearance. But, flush pointing is more durable because of resisting the provision of space for dust, water etc., due to this reason, this method is extensively used.

2. Recessed Pointing
In this case, mortar is pressing back by 5mm or more from the edges. During placing of mortar the face of the pointing is kept vertical, by a suitable tool. This type gives very good appearance.

3. Beaded Pointing
It is formed by a steel or ironed with a concave edge. It gives good appearance, but it will damage easily when compared to other types.

4. Struck Pointing
This is a modification of flush pointing in which the face the pointing is kept inclined, with its upper edge pressed inside the face by 10mm which drains water easily.

5. Rubbed, Keyed or Grooved Pointing
This is also a modification of flush pointing in which groove is formed at its mid height, by a pointing tool. It gives good appearance.

6. Tuck Pointing
In this case mortar is pressed in the raked joint first and finishing flush with the face.
While the pressed mortar is green, groove or narrow channel is cut in the center of groove which is having 5mm width and 3mm depth. This groove is then filled with white cement putty, kept projecting beyond the face of the joint by 3 mm. if projection is done in mortar, it is called bastard pointing or half tuck pointing.

7. V- Pointing
This is formed by forming V-groove in the flush-finishing face.

8. Weathered Pointing
This is made by making a projection in the form of V-shape.

No comments:
Post a Comment